The pace of development of consumer-level drones and quadcopters over the last 5 years has been quite extraordinary. Not long ago, remote controlled drones capable of carrying cameras were extremely specialised, expensive bits of kit that were very difficult to fly, and were to be found only in the hands of professional videographers and a handful of RC aviation enthusiasts. Now, there are a number of models that are within reach (and budget!) of the average action camera user who is looking for new and exciting angles for their videos, and/or for the fun of flying their own drone around!
In a way, the development of these consumer-level quadcopters has mirrored that of the action camera market. What was once a niche area has been opened up to a whole new market as the technology has improved and come down in price. And in the same way that GoPro has come to dominate the action camera field, so DJI and its Phantom range of quadcopters are becoming the de facto standard for those looking to get started with this technology.
However, the key question for people wanting to get into this area is whether to go for the convenience of a Phantom with a built-in camera, or to chose instead to get a Phantom onto which you can mount a GoPro? We’ve considered the various options further below, so read on!
DJI range history
Since the first DJI Phantom was introduced there have been 5 different models, with gradually increasing specifications. Fundamentally, these are all based on two key releases of the Phantom hardware – the Phantom 1 and the Phantom 2. The model evolution is as follows:
Phantom 1 models
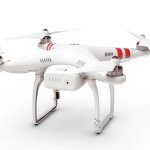
- Phantom 1- At the bottom of the DJI range is the Phantom 1, which was introduced in December 2012. This model does not feature a camera, but has the ability to mount a GoPro slung underneath it. However, the GoPro is attached directly to the drone, without a gimbal to stabilise it.
- Phantom FC40 – Next up is the Phantom FC40 which is based on the Phantom 1 platform but with a built-in 720p/30 fps video camera mounted underneath. This introduces the ability both to control the camera remotely while the drone is in the air, and to use the footage from the camera to enable a first person view (‘FPV’) from the drone itself, enabling the user to actually pilot the drone as if they were onboard. However, the camera remains un-gimballed as with the Phantom 1.
Phantom 2 models
 Phantom 2 – Stepping up the range, you then come to the DJI Phantom 2. This improves on various aspects of the Phantom 1, including battery life (25 minutes, up from 15 minutes) and maximum payload (1.3kg, up from 1kg). It also introduces support for a camera gimbal (the Zenmuse H3-2D or 3D), which allows a GoPro camera to capture stable footage no matter how much the drone is moving around.
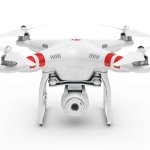 Phantom 2 Vision – DJI also introduced the Phantom 2 Vision, which is based on the Phantom 2 platform but also includes a built-in camera with single-axis stabilisation, shooting at 1080p/30 fps. The camera’s pitch (the angle it points in relation to the drone itself) can be controlled in a range of 0 to 60 degrees
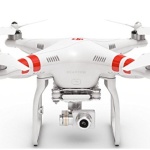 Phantom 2 Vision+ – This is the latest iteration of the Phantom range – again based on the Phantom 2 platform. Here, the camera system has been upgraded to feature 3 axis stabilisation, 0 – 90 degree pitch control (so the camera can be tilted to point straight down), and an increased range of wifi video downlink compared to the non-plus model (700m vs 300m).
Given that these models are all based on the same underlying quadcopter technology (the Phantom 1 or 2), we’ve focused on the most recent versions, comparing the Phantom 2 Vision+ to the Phantom 2 with a Zenmuse H3-3D gimbal and a GoPro. However, the more general considerations here will apply to the earlier models as well. We’ve aimed to set out the key differences, advantages and disadvantages of each approach, so that you can decide which is the best for you!
Phantom 2 Vision+
The Phantom 2 Vision+ represents a complete out-of-the-box solution. For around $1,160 (click here to check out the latest price) you get the complete package of drone, gimbal and camera, all of which work together without the need for any additional equipment or tinkering. The camera itself can shoot in full 1080p HD at 30 fps, or at 720p at 60 fps, and can take still photographs at 14 MP – somewhat unusually, these can be captured in raw format as well as JPEG. The field of view can be set to 110 or 85 degree FOV. The camera looks different to those on the previous Phantom 2 Vision and FC40 models, wrapped as it is in smart aluminium alloy rather than the chunky ‘upside down webcam’ look of the previous generations.
 The key improvement between the Phantom 2 Vision and this ‘Plus’ model is the introduction of a full 3D gimbal. Previously, the Phantom 2 Vision gimbal was only stabilised in a single axis of motion. The Vision+ has full 3D stabilisation, meaning that however the quadcopter moves, the gimbal keeps the camera level and the footage smooth. This is a huge improvement, and really makes the Vision+ capable of capturing stunning professional-looking footage.
The big advantage of the Phantom 2 Vision+ (in comparison to the Phantom 2 and GoPro combination considered below) is that the Vision+ has everything needed to work as a FPV quadcopter straight out of the box – just charge the batteries, attach the propellers 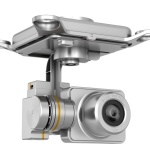 and go (though we would also advise reading the manual first!) The camera integrates directly with the DJI Vision app on your smartphone, which allows you to control the camera’s orientation (adjusting the pitch of the gimbal up and down), start and stop the video recording, take still photographs, and change the settings on the camera. It also allows you to view a live feed of the footage from the camera, enabling it to be flown in ‘FPV’ mode. While this is all potentially achievable with a GoPro set up (as discussed below), it will inevitably be more complicated and cost more. For those users looking for something which is more a hobby and a bit of fun than a more serious aerial camera platform, the Phantom 2 Vision + is perhaps the better way to go.
Phantom 2 / Zenmuse H3-3D Gimbal / GoPro
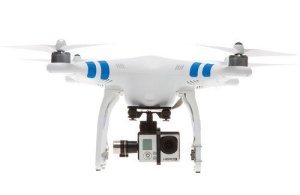 The alternative approach is to purchase the DJI Phantom 2 without a built in camera, and then equip it with a Zenmuse H3-3D gimbal, and a GoPro. The ‘naked’ Phantom 2 costs around $579, while the H3-3D gimbal is currently around $379 (a total of $958), but the two items can be purchased together for $829, thus saving over $100. Of course, you then need to add a GoPro camera (if you don’t already have one). Depending on which model GoPro you chose, this package could work out a bit cheaper than the Vision+ route – for example, a $200 GoPro 3 White would take the overall package cost to $1,029 – over $100 less than then Vision+, while still matching the Vision+’s 1080p/30fps or 720p/60fps video specs. Alternatively, you could step up to the GoPro 4 Black for $500, taking the total package cost to $1,329. However, in doing so, you would
 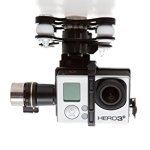 then have a quadcopter system capable of shooting in 4K resolution at 30fps – considerably higher quality than the Vision+’s built in camera. Another advantage of being able to record video at 4K is that it allows still frames from the video to be extracted and used as photos with an acceptable resolution. Even comparing the base GoPro 3 White’s quality against the Vision+’s camera, the consensus is that the GoPro slightly wins out on video, though it is a fairly close run thing.
Aside from the higher video quality, the other advantage of the GoPro option is that you can unmount the camera from the drone and use it for other activities – so the technology (and your investment!) is not sat idle when you’re not flying the quadcopter. It also means you can take the camera off when you don’t need to be filming, and just want to play with the drone – potentially saving you from damaging the GoPro if you have a crash. Be aware though, the Phantom 2 does handle quite differently with the weight of the GoPro, so it is worth practising your flying skills with the camera onboard.
However, the key disadvantage of the Phantom 2 / GoPro option is that it does not allow the camera to be controlled during flight, or (without the addition of further hardware) allow FPV flying of the drone. While you can control the pitch of the Zenmuse gimbal between 0 and 90 degrees, there is no way to start or stop the GoPro recording, or to change the video mode. While the GoPro cameras can provide remote wireless streaming and control to the GoPro smartphone app, this is very much NOT recommended to be used in conjunction with the Phantom 2 – the 2.4Ghz wifi signal used is the same frequency as that used by the remote flight controller, and interference could lead to the drone becoming uncontrollable – not good! As such, the wifi on the GoPro should be turned off entirely before use with the Phantom 2.
The lack of an ability to change the settings isn’t necessarily a huge problem – given the Phantom 2’s flying time is only about 25 minutes on a battery charge, it is easy just to set the GoPro recording at its highest resolution before take-off, and then edit down to the footage you actually want later.
Achieving FPV with the Phantom 2 / GoPro combo
The lack of a FPV mode is more of an issue. Without it, you cannot fly the Phantom further than your line of sight, which limits the type of flying you can do with it. However, there are solutions to this. These all involve purchasing an additional transmitter unit (working at 5.8Ghz so as not to interfere with the Phantom’s flight controller) which plugs into the GoPro and provides live video from the camera to a video screen, which can usually be mounted on the Phantom’s remote control unit.
There are a number of different ways to achieve this, and a full discussion of them all is beyond the scope of this article, but one of the neatest involves the following components:
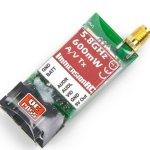 An Immersion 5.8 GHz RC transmitter to beam the video from the quadcopter to your monitor on the ground
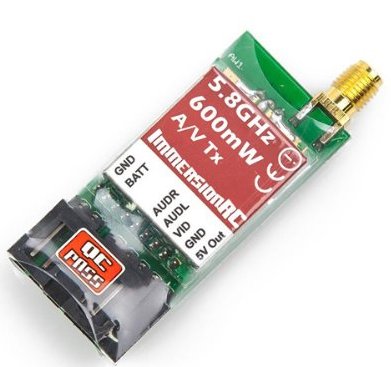
- A plug and play cable which links the transmitter into the feed already coming from the GoPro into the Zenmuse gimbal
 A Black Pearl monitor to receive and display the video feed.
The combined cost of this additional equipment is in the region of $330. As such, depending on what model of GoPro you include with the package, the total cost of a Phantom 2 / Zenmuse H3-3D / GoPro / FPV package is going to be in the region of $100 (with a GoPro 3 White) to $400 (with a GoPro 4 Black) more than the Phantom 2 Vision+.
It is also the case that setting up the GoPro FPV option involves a bit of light “tinkering” – using the Immersion RC transmitter discussed above, for example, you will need to open up the top of the Phantom 2 (which is pretty straight-forward to do by just removing a few screws) and insert the plug and play cable into a socket on the Phantom; it is also necessary to mount the Immersion transmitter on the base of the GoPro using some double sided foam tape or similar. There are various videos and guides on the internet that will walk you through this. As such, if you want FPV functionality from a GoPro rig, there is a little bit of work for you to do to get it set up. Some users will relish this as a bit of an interesting challenging; others will doubtless recoil from it!
It’s also undoubtably the case that the resulting set up is not quite as slick as the Phantom Vision 2+ with its smartphone or tablet integration, and it still lacks the ability to control the camera while in flight. Set against that, however, is the fact that if you deploy the GoPro 4 Black, you can capture your aerial footage in glorious 4K resolution, and detach the GoPro and use it for other projects. It’s also the case that the transmitter and screen technology could be removed and re-used on other drones you might own in the future, whereas if you replace the Vision 2+ model, all of its technology goes with it.
Which model to buy?
So, which should you buy then? Well, you’ll doubtless have your own views, but our recommendation is as follows:
- If your primary interest is in flying the drone around rather than photography, and you don’t already own a GoPro Hero 3 or 4, get the Phantom 2 Vision+ – it’s the best out of the box solution.
- If you already own a GoPro Hero 3 or 4, go for the Phantom 2 with the Zenmuse H3-3D – it’s cheaper, and you can easily add the FPV technology on to it at a later stage if you so desire.
- If your main interest is aerial photography, get the Phantom 2, the Zenmuse 3H-3D Gimbal, a GoPro Hero 4 Black edition and your choice of FPV kit – you won’t regret it!